As the temperatures are dropping and winter is settling in for good, playing outside in the snow is not an option for your little ones. If you are a daycare or preschool teacher, you will need to have an arsenal of fun winter craft ideas to keep your students creatively busy when the cold outside is too much to bear.
Winter as a topic lends itself to beautiful lesson plans and fantastic hands-on crafts that will help your students better understand the season and practice their fine motor skills while putting their imagination to the test.
So, grab a cup of hot coffee, sit comfortably and take notes while we offer you a list of ten amazing pre-k winter craft ideas to save the day when your students are getting a bit rowdy and need to be creatively entertained.
Ready?
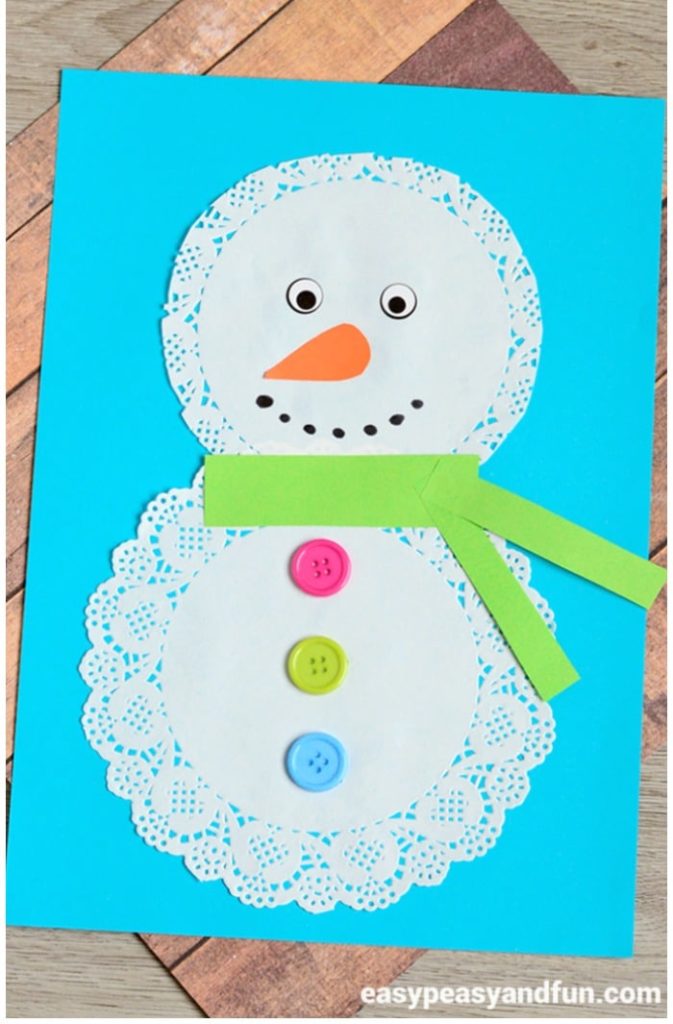
1. Daily Snowman
Nothing is cuter, or easier for that matter, than a doily snowman! It is a fun activity that will not limit your students’ creativity, as each one can put their own artistic touch on the snowman. In addition, the materials you need are ones that typically teachers already have in their classroom for their pre-k winter art projects. So what will you need?
- Doilies (different sizes preferably)
- Buttons, pom-poms, and colored paper for decorating
- A sheet of paper for the background (ideally blue)
- An orange sheet of paper for the nose
- Scissors
- Glue stick (liquid glue will wrinkle up your doily, so try to avoid it)
- Marker or wiggle eye stickers for the eyes
Take two doilies to create the head and the body of the snowman. The head should be smaller, so if you are using the same size doilies, trim one to make it a bit smaller. Glue them on your colored paper. Use the buttons or pom-poms and glue them on the snowman’s body. Cut out a triangle from your orange sheet of paper and use it as the nose. Use your markers or wiggle eye stickers for the eyes. Decorate your snowman with a scarf, and voila! You have a cute, doily snowman and happy students.
Find the original idea here.
2. Cotton Ball Snowflake
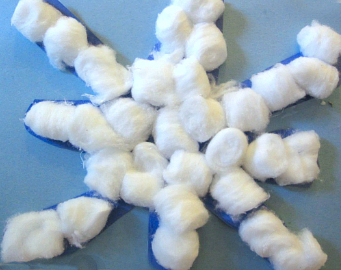
Toddlers and pre-k students will love this. As little fingers love to manipulate cotton balls and find their soft texture exhilarating, a cotton ball snowflake ranks high amongst the favorite pre-k art activities for winter. Best part? You only need materials that all daycare facilities have handy.
- Cotton balls
- Glue
- Wide Paintbrush
- Construction Paper
Take two pieces of construction paper and glue them together to make your snowflake more sturdy. Use the wide paintbrush to put glue on the paper in the shape of your desired snowflake. Apply glue liberally to ensure that the cotton balls remain glued on the paper. Have your students stick the cotton balls on the paper. Use scissors to cut around the shape. You can then hang the snowflakes on your windows or put them around your classroom for a DIY winter wonderland.
View the original idea here.
3. Teddy Bear Hibernation Project
As you talk about winter with your pre-k students, the topic of hibernation is bound to come up. Children are fascinated with bears, and even though these animals do not hibernate in the strict sense of the word (they sleep for 100 days without eating or drinking in a state called torpor), teachers include them in their lesson plans. Concluding your hibernation lesson with a fun pre-k winter art project that involves a hibernating teddy is a brilliant way to reward your students. So, what will you need?
- Outline of a teddy bear
- Brown construction paper
- Colored construction papers
- Colorful buttons
- Assorted pom-poms
- Googly eyes
- Scraps of fabric for the blanket
- Newspapers
- Shoebox (you can ask the kids to bring their own)
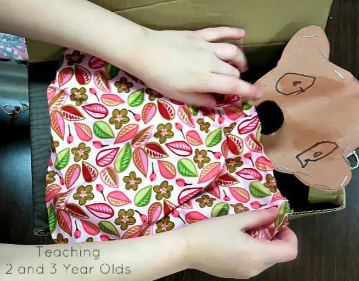
Cut out two teddy bears per student from your brown construction paper. Give one to your students and ask them to decorate it as they please. They can color it, stick googly eyes, use buttons or pom-poms, or even cut shapes from other colored construction papers. Take the second cut-out teddy bear and staple it on the back of the first, leaving a little opening. Fill the teddy bear with crinkled newspaper and staple close the opening. Give the students a shoebox and have them decorate it to create a bed for the teddy. Tell them that it is where the teddy bear will hibernate for three months, so it has to be super comfy and appealing! Place the teddy bear inside and cover it with the fabric blanket.
Find the original idea here.
4. Winter Mittens
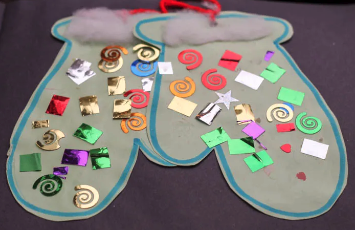
Children love mittens! What better way to keep them busy than having them create their own decorative winter mittens? You will need:
- Paper
- Scissors
- Marker pen
- Cotton wool
- Glue
- Sequins, sparkles, and other things to decorate with
- String to hang them up together
Draw mittens on a piece of paper and give your students two to decorate. Let their imagination go wild. The sky is the limit! Place all decorative items on the table and have them choose what they like. They can mix and max, color, glue and make their mittens as extravagant and sparkly as they like. Cut out the mittens and use a piece of string to hang them up together.
See the original idea here.
5. Paper Roll Snowman Craft
Your pre-k art activities for winter could not possibly be complete without a snowman! This paper roll snowman craft is ideal for little hands that are still developing their fine motor skills and dexterity. You will need:
- Toilet paper rolls (you can order them online or ask the kids to bring one from home)
- White paper or paint
- Colored paper for the scarf
- Orange paper for the nose
- Black marker
- Scissors
- Glue
Cut the white paper and glue it around the paper roll. Alternatively, you can use white paint to color the roll. Cut a thin and long strip of colored paper to use as the scarf and glue it at two-thirds the height of the paper. Cut a piece of an orange triangle for the nose. Use a black marker to draw the eyes and the buttons on the snowman’s body. Line your snowmen on your window sill or a winter-themed corner of your classroom. You may even have different size ones if you use rolls of varying width and height.
Find the original idea here.

6. Winter Hat Craft
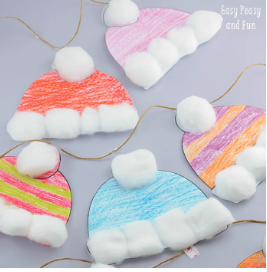
Of course, your winter clothes and accessories craft collection would not be complete without a winter hat to match those cute mittens! These hats make for a great boredom buster and will help your little ones with their fine motor skills. Added bonus? You can use them to create a winter-themed bulletin board! What you need:
- Hat template or draw a hat on paper
- Different coloring items for decoration – crayons, watercolors, markers, etc.
- Cotton balls
- Glue
- Scissors
Give your students a hat template. Alternatively, you can draw a hat on paper. Ask them to color it using any colors and any items they like. Glue cotton balls on the top and bottom of the hat. Cut the shapes of the hats and either pin them on a bulletin board or hang them around the classroom using a piece of string. If you want to kick it up a notch, hang a piece of string from one side of your classroom to the other and use clothes pegs to hang the hats in a row creating a makeshift washing line.
Find the original idea here.
7. Penguin Handprint Craft
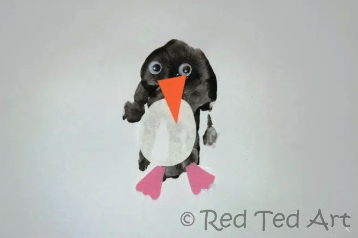
Ah! Penguins! You have to love how excited little students get over penguins and how fascinated they are by these Arctic birds. So why not include a penguin handprint craft in your pre-k winter art projects and see your students’ faces light up with excitement? Here is what you will need.
- Black paint
- Googly eyes
- Orange construction paper
- Colored paper to put the handprint on
- Markers or crayons
Have your students put their palms in black paint and then stencil them on a piece of colored paper. Use the black palm stencil as the body of the penguin. Cut out a piece of white circular paper to use as the penguin’s belly and glue it on the palm stencil. The students can decorate their penguins with googly eyes and crayons. They can use a piece of orange construction paper to cut out a triangle for the nose and two smaller ones for the feet.
Find the original idea here.
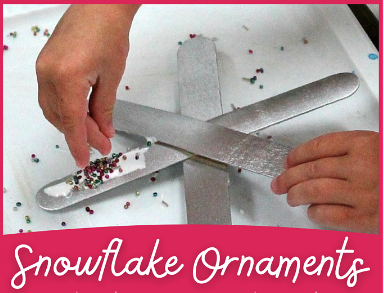
8. Snowflake Ornaments
These snowflake ornaments will add some sparkle and pizzaz to your classroom! It is one of the easiest and most fun winter activities for pre-k. The best part of all? These ornaments will give your students the opportunity to practice their fine motor skills and unleash their creativity while keeping them busy when the cold winter months do not allow for outdoor play. You will need:
- Jumbo craft sticks
- Silver spray paint
- Glue
- Colored seed beads
- Sequins
- Ribbon
Use the silver spray paint to color the jumbo craft sticks (normal craft sticks could work just as well, but the jumbo ones are easier for little hands to manipulate plus they offer a bigger surface area to decorate). Glue the sticks together in a star-shaped pattern to create your snowflake. Have the students decorate their snowflakes using colored seed beads, sequins, etc. Alternatively, your students can even use colored markers to draw patterns on their snowflakes. Use a piece of ribbon to hang the snowflake if you like.
Find the original idea here.
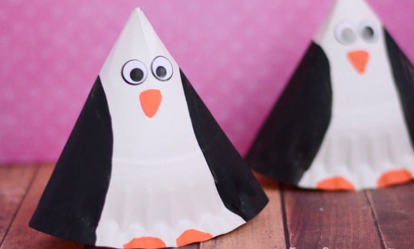
9. Rocking Paper Plate Penguins
Your students will love this pre-k winter craft. Rocking paper plate penguins is easy to make, and the wobbly penguin result sure puts a huge grin on their faces. So here is what you need:
- Paper plate (one plate can make two penguins)
- Glue or stapler
- Scissors
- Black paint or markers
- Orange paint or markers
- Paintbrush (if using paint)
- Googly eyes
Cut your paper plate in half and roll it into a cone. You can either glue or staple the cone together. Paint the wings and the back of the penguin black. Use orange paint to make the beak and glue two googly eyes on top. Create several penguins for a wobbly, fun parade and keep your students entertained while they improve their fine motor skills and hand-eye coordination.
Find the original idea here.
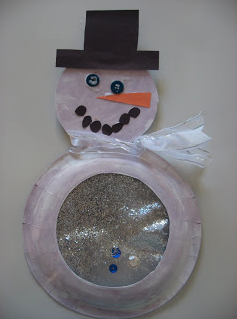
10. Snowglobe Snowman
These snowglobe snowmen are a big hit even though they require a little bit of extra work than all the pre-k activities for winter we have described so far. However, the end result is entirely worth it as your little ones will be utterly smitten with their snowmen. So here is what you need:
- Paper plate
- Orange and black construction paper
- Buttons
- Sequins
- Sparkles
- Contact paper
- Scissors
- Double-sided tape
- Stapler
- Ribbon
First, have the students color their paper plates. While the plates dry out, prepare the snowman’s nose from the orange construction paper, and the tall hat from the black construction paper. Cut some black circles to use as the coal pieces for the mouth. Then cut a piece of contact paper and ensure that it is big enough to cover the hole you cut in the plate. Peel back the contact paper backing and allow your little ones to shake the sparkles on it, and add the sequins. Fold the contact paper to sandwich the sparkles and sequins and seal it shut. Cut out the middle of the paper. You will use it to make the snowman’s face. Have your students glue the nose, the eyes, and the mouth from your pre-cut construction paper shapes. Glue the contact paper on the inside of the plate ring to create the snowglobe effect. Staple the paper face to the snowman’s belly. Finally, glue the top hat and a colored strip of paper as a scarf.
Find the original idea here.
