Boosting posts is an effective and inexpensive way to get more exposure for your content. It’s a simple and easy process – posts are boosted right from your Facebook Page – and you can boost a post for any amount you want.
It’s a great way to get more people to see your posts, promote special events, offers and news, and to reach new audiences through targeting. Facebook is the largest social media platform and you have to ‘pay to play’ these days. Since so many businesses and people are using Facebook to communicate, it’s hard to capture your audience’s attention. Boosting a Facebook post is one way you can get your content in front of more people.
Step 1: Create a post on your Facebook Fan Page
For best results, allow some time for the post to go out to fans as normal. This is called organic – without paying. This will make your boost even more impactful and will save you from paying for your committed fans to engage with your post.
Step 2: Go to the post you want to promote
At the bottom righthand corner of the post, you’ll see a blue button with “Boost” in white text. Click that to open up the boost information.
Step 3: This is where you’ll choose your audience
- If you select People you choose through targeting, you’ll be able to specify the people you show your boosted post to. Then, refine their locations, ages, genders and interests.
- If you select People who like your Page and their friends, your boosted post will only be visible to those people. Note: this option is available if at least 50 people like your Page.
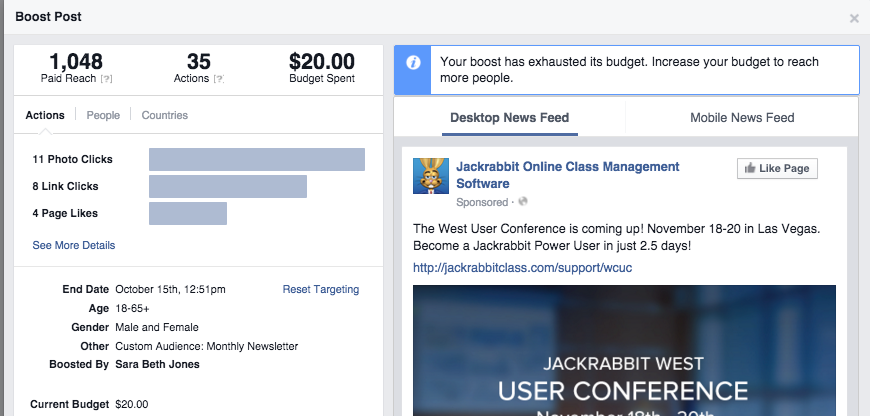
For this example, I targeted our monthly newsletter list which I uploaded in the Facebook Ads section. This is called a Custom Audience and you can get more info here.
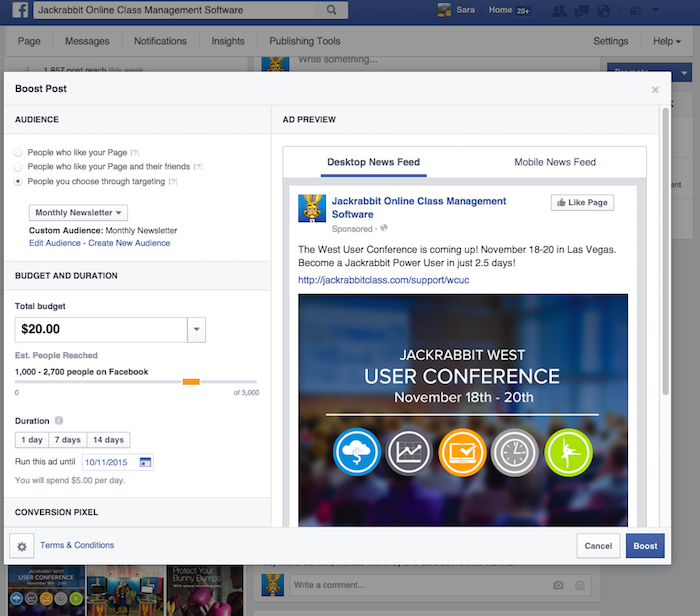
Step 4: Choose your budget
- Set your maximum budget. You can spend as much or as little as you want. We’ll give you an estimate on the number of people you’re going to reach depending on the amount you set.
- Choose your duration. Your post is automatically boosted for one day, but you can select up to 7 days.
- Click Boost
Note: There are guidelines you must follow for a post to be eligible for boosting. You can’t have more than 20% of text on the image you’re uploading. There is a tool that will check your image for you – click here.
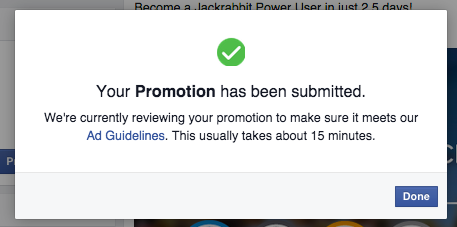
Step 5: Your ad will go to Facebook to be approved
There are a few things you should know about Facebook’s advertising policies – read them here.
Step 6: Check your metrics. Did the ad work?
In the bottom righthand corner of the post you boosted, you’ll see a “View Results” button now. [Remember, this is the same location you saw the “Boost” button.]
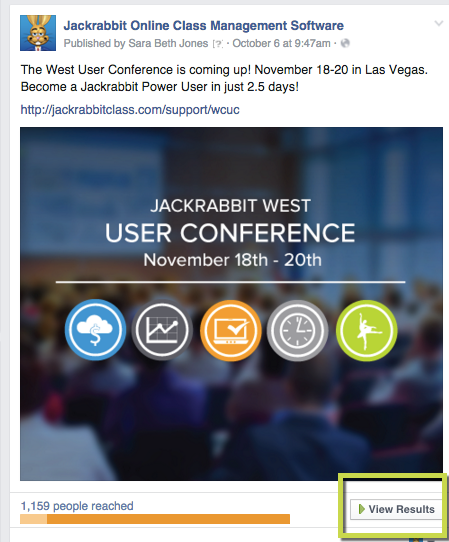
In this screen, you can see how many people clicked on the photo, the link, liked your page and see other metrics. This is important to keep an eye on to see how well the advertisement work and be able to track if your enrollment goes up any.
